


The Raspberry Pi 5 is a powerful and versatile single-board Kit computer, and as such, it can generate quite a bit of heat, especially when overclocked or running intensive tasks. One of the most effective ways to keep your Raspberry Pi 5 cool is by using a water cooling kit. In this article, we’ll explore the benefits of water cooling, how to set up a water cooling kit for the Raspberry Pi 5, and some popular options available on the market.
Why Choose Water Cooling?
1. Superior Cooling Efficiency:
Water cooling is more efficient than air cooling because water Kit has a higher heat capacity than air. This means it can absorb and transfer more heat away from the processor, ensuring lower operating temperatures.
Table of Contents
2. Quieter Operation:
Water cooling systems often operate more quietly than air coolers, especially those with large fans or multiple fans. This is because water cooling systems rely on liquid Kit to absorb heat, which is then dissipated through a radiator.
3. Overclocking Potential:
If you’re planning to overclock your Raspberry Pi 5, a water cooling kit can provide the necessary cooling to prevent overheating. Overclocking can significantly boost Kit performance but also increases heat output, making efficient cooling essential.
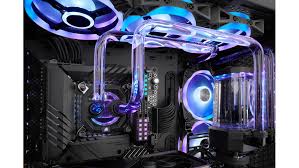
4. Aesthetic Appeal:
For those who appreciate a visually appealing setup, water cooling kits can add a sleek and modern look to your Raspberry Pi 5. With various customizable options, including colored coolant and LED lighting, you can create a setup that stands out.
Components of a Water Cooling Kit
A typical water cooling kit for the Raspberry Pi 5 includes the following components:
- Water Block: The water block is a crucial component that sits directly on top of the Raspberry Pi’s CPU. It’s usually made of copper or aluminum and serves as the primary contact point for heat transfer from the CPU to the coolant.
- Pump: The pump circulates the coolant through the system, ensuring continuous heat absorption and dissipation.
- Radiator: The radiator is responsible for releasing the absorbed heat from the coolant into the air. It typically includes fans to enhance the heat dissipation process.
- Reservoir: The reservoir holds the coolant and serves as a filling point for the system. It also helps in removing air bubbles from the coolant loop.
- Tubing: Tubing connects all the components, allowing coolant to flow throughout the system. It’s essential to choose high-quality, flexible tubing to prevent leaks and ensure durability.
- Coolant: The liquid that circulates through the system, absorbing heat from the water block and releasing it in the radiator. Coolants are often mixed with additives to prevent corrosion and algae growth.
- Fittings: Fittings connect the tubing to other components and ensure a leak-proof setup. It’s crucial to choose compatible fittings for your tubing size.
Setting Up a Water Cooling Kit for Raspberry Pi 5
Step 1: Gather the Required Tools and Materials
Before starting the process of installation , gather all necessary tools & materials. You will need a screwdriver, thermal paste, a cooling kit (with all components mentioned above), and a clean workspace.
Step 2: Prepare the Raspberry Pi
- Turn Off and Disconnect: Ensure the Raspberry Pi is turned off and unplugged from any power source.
- Remove Existing Cooling Solutions: If you have any existing cooling solutions (heatsinks or fans), remove them carefully.
- Clean the CPU: Use isopropyl alcohol and a lint-free cloth to clean any residual thermal paste from the CPU.
Step 3: Install the Water Block
- Apply Thermal Paste: Apply a small amount of thermal paste to the Raspberry Pi’s CPU.
- Attach the Water Block: Secure the water block onto the CPU, ensuring it’s tightly fastened for proper contact.
Step 4: Connect the Tubing
- Cut the Tubing: Measure and cut the tubing to the appropriate length, ensuring it fits well between components.
- Attach to Water Block and Radiator: Connect one end of the tubing to the water block and the other to the radiator. Secure with fittings to prevent leaks.
Step 5: Set Up the Pump and Reservoir
- Position the Pump and Reservoir: Place the pump and reservoir in a stable location. Ensure it’s below the water block to prevent air pockets.
- Connect Tubing: Connect the tubing from the radiator to the pump and reservoir. Secure all connections with fittings.
Step 6: Fill the System with Coolant
- Fill the Reservoir: Slowly fill the reservoir with coolant, allowing it to flow through the system. Monitor for any leaks.
- Power the Pump: Temporarily power the pump to circulate the coolant and remove air bubbles. Top up the reservoir as needed.
Step 7: Final Assembly
- Secure All Components: Make Sure all components are securely and safely fastened and properly routed tubing to avoid kinks or obstruction.
- Check for Leaks: Run the system for a few hours to check for any leaks. Address any issues before proceeding.
Step 8: Power On and Test
- Reassemble the Raspberry Pi: Reattach any components or peripherals to the Raspberry Pi.
- Power On: Turn on the Raspberry Pi and monitor temperatures using a suitable software tool.
Conclusion
A water cooling kit for the Raspberry Pi 5 offers superior cooling performance, quieter operation, and the potential for overclocking. With the right components and setup, you can ensure your Raspberry Pi runs efficiently and reliably, even under heavy workloads. Whether you’re a hobbyist or a professional, investing in a water cooling solution can be a worthwhile enhancement to your Raspberry Pi 5 setup.


